64th02 Computer, Part 1
Published:
I recently built an 8-bit computer on a breadboard using a 6502 microprocessor. The experience was great, but I’ve been dying to migrate this project to an actual PCB so I can play around with it without worrying about breaking it. I’d also like to remove the dependence on a Raspberry Pico, since it feels like cheating to use a device significantly more powerful than a 6502 for a 6502 computer. My end goal is to build a FORTH interpreter from scratch that I can run on this machine. This is the beginning of my 6-FORTH-02 Computer, AKA the 64th02!
Computer at the start of this project: 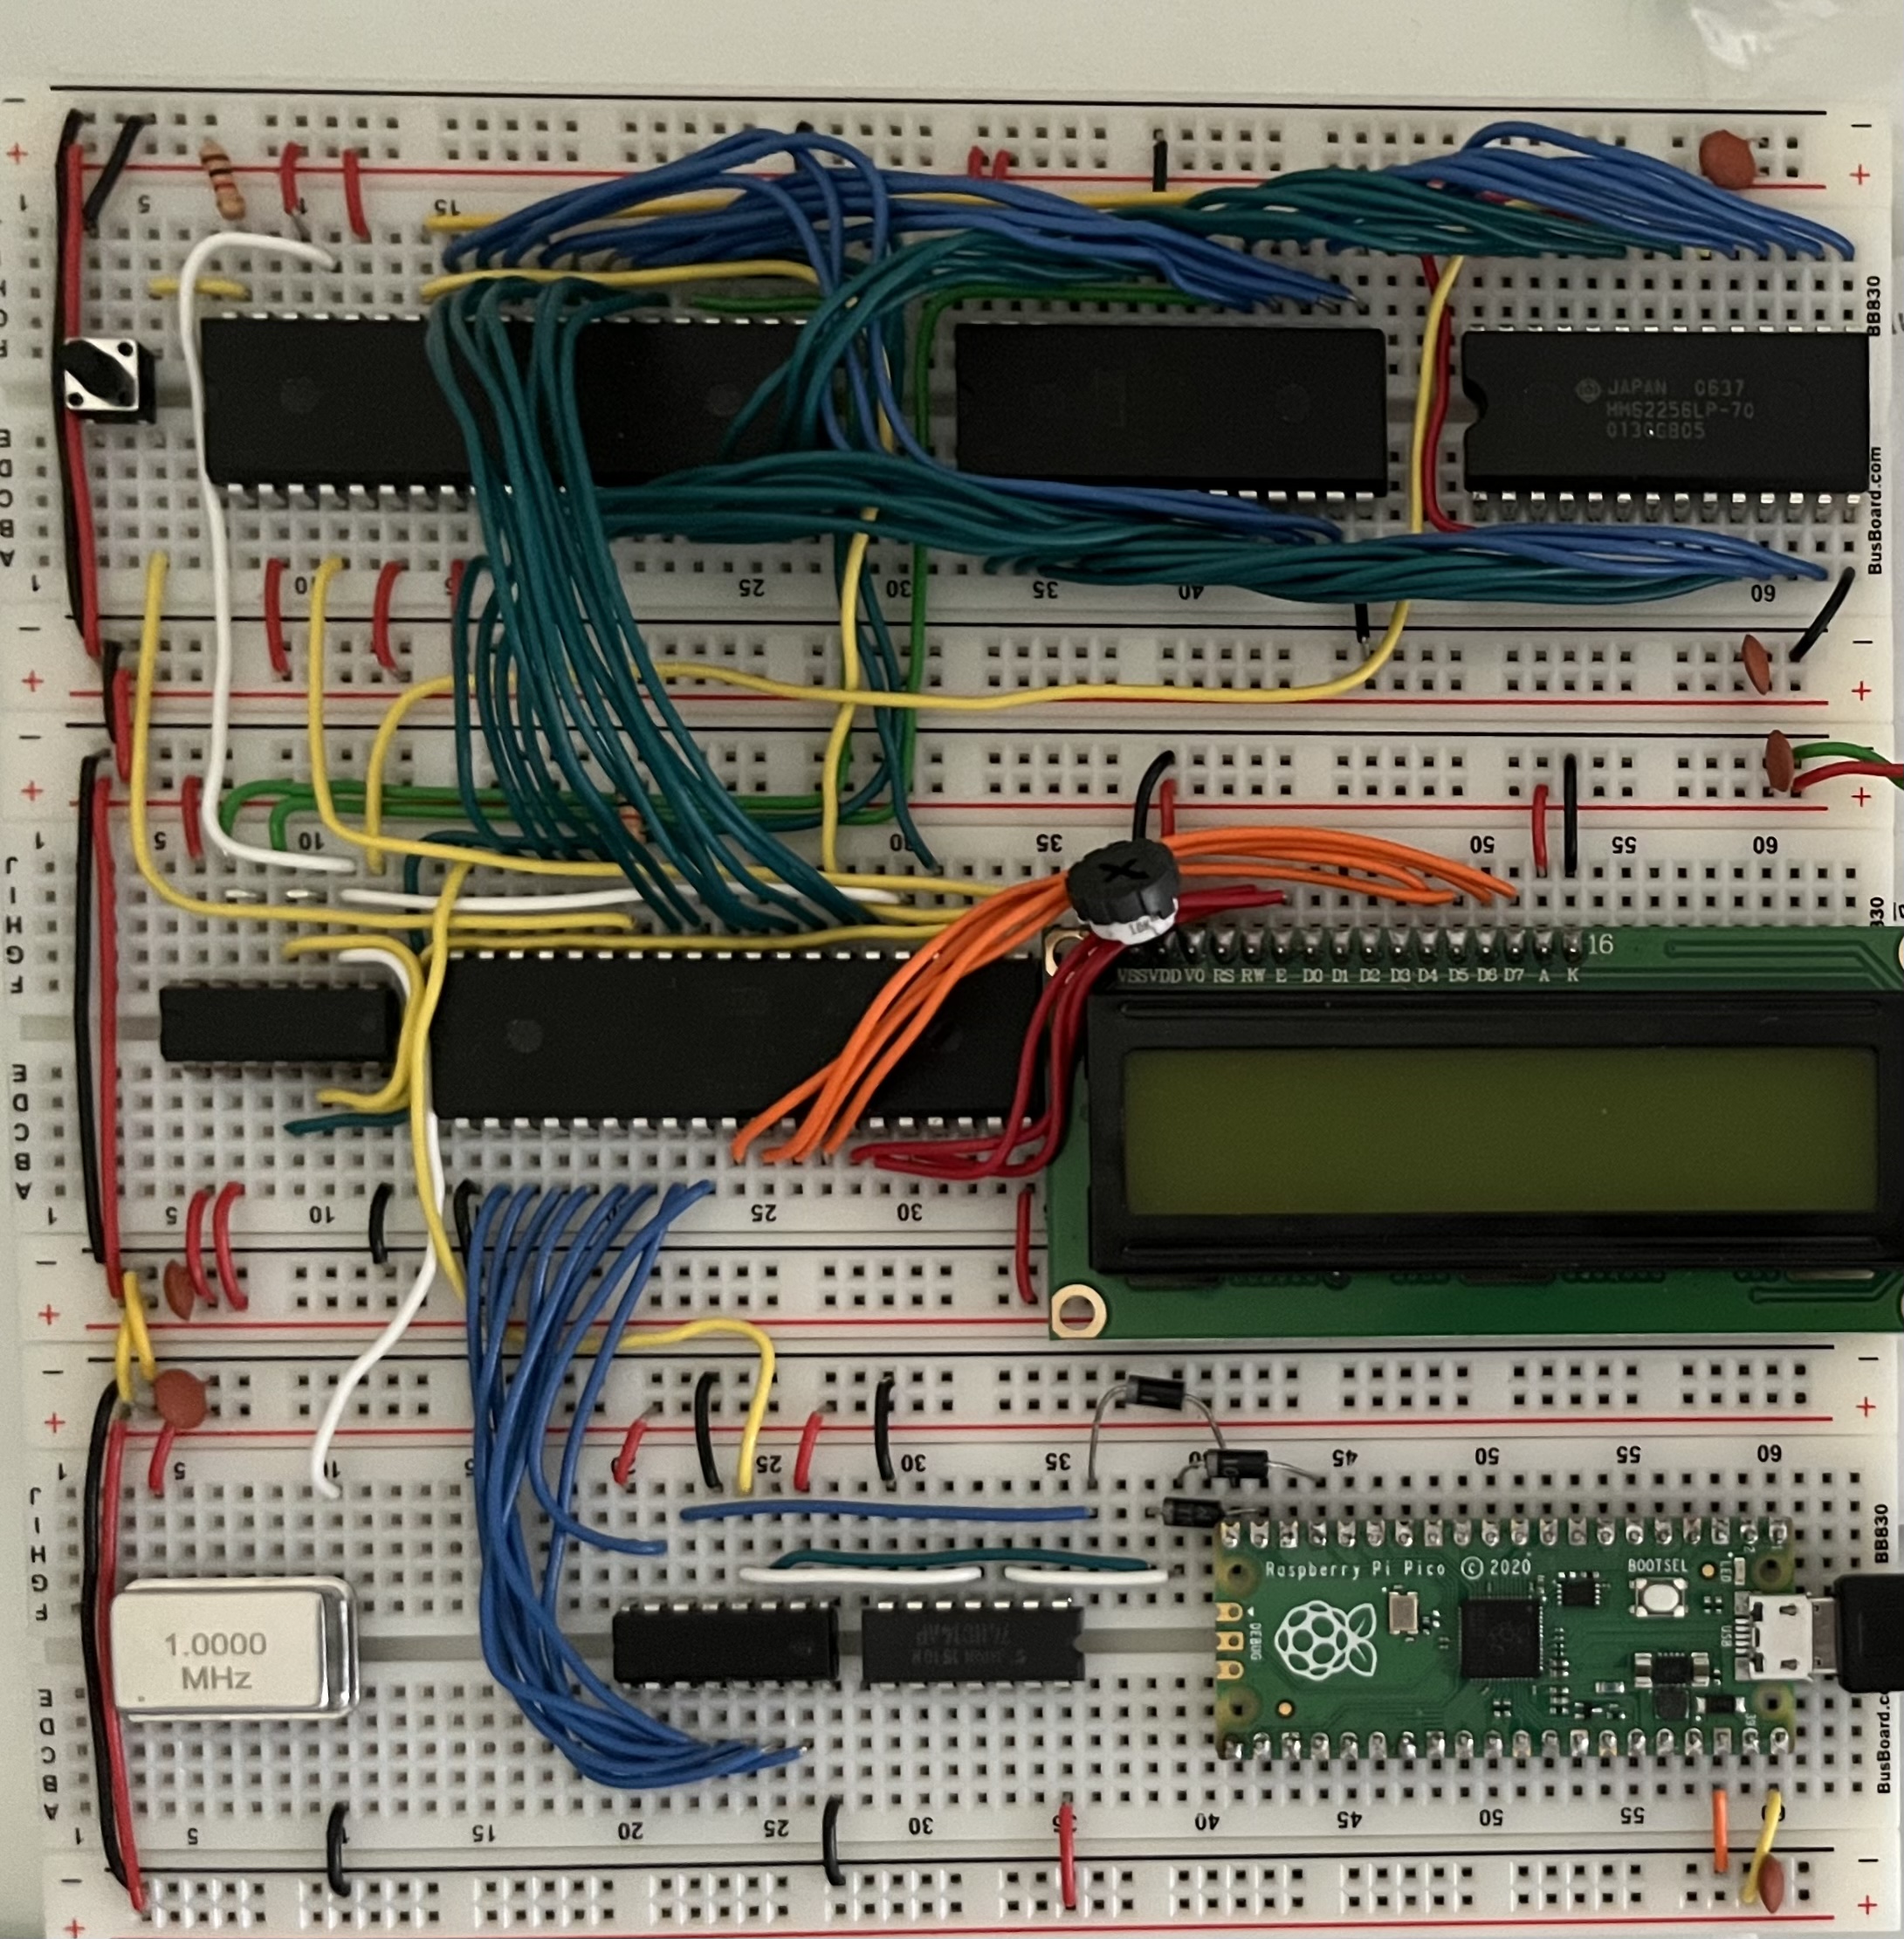
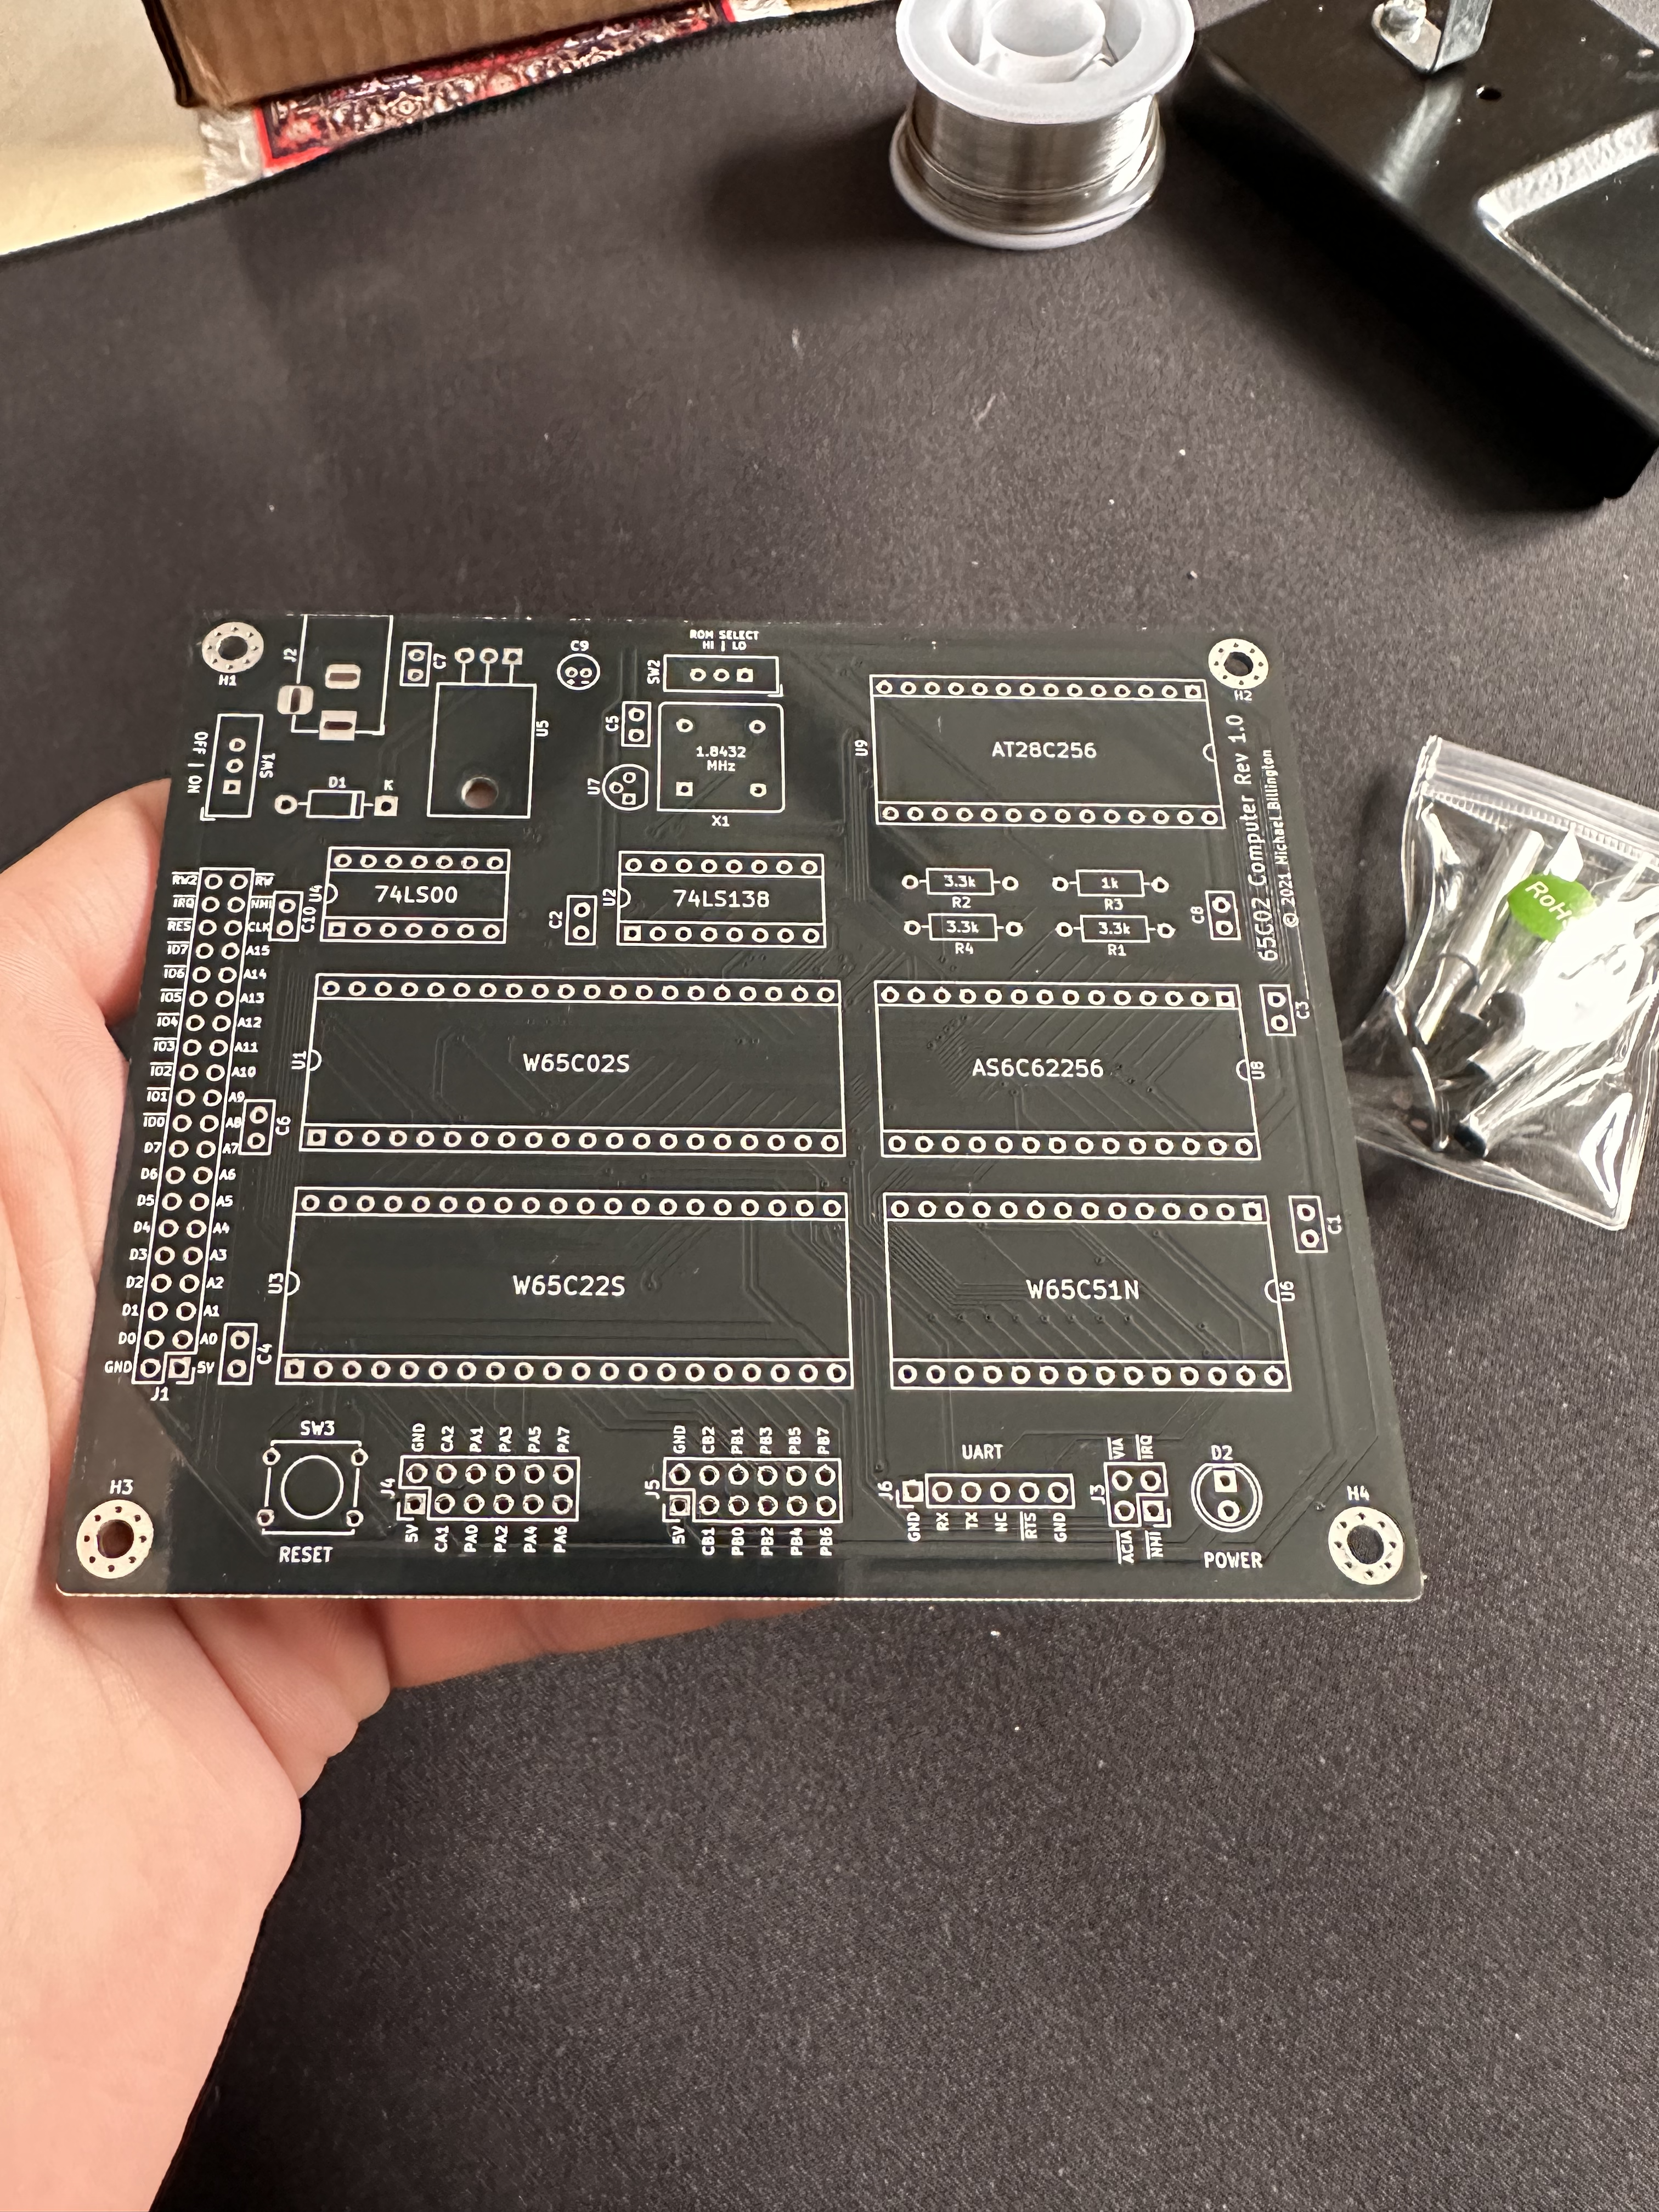
Luckily, I recently stumbled upon an excellent blog by Mike Billington detailing how he moved his 6502 built to a pcb. After discovering how surprisingly affordable it is to have custom pcbs printed at PCBway.com, I found myself with a shiny new stack of PCBs.
Initial Construction
This PCB is very well laid out, so it was just a matter of soldering in the components in the right locations.
Starting out with the DIP sockets and voltage converters:
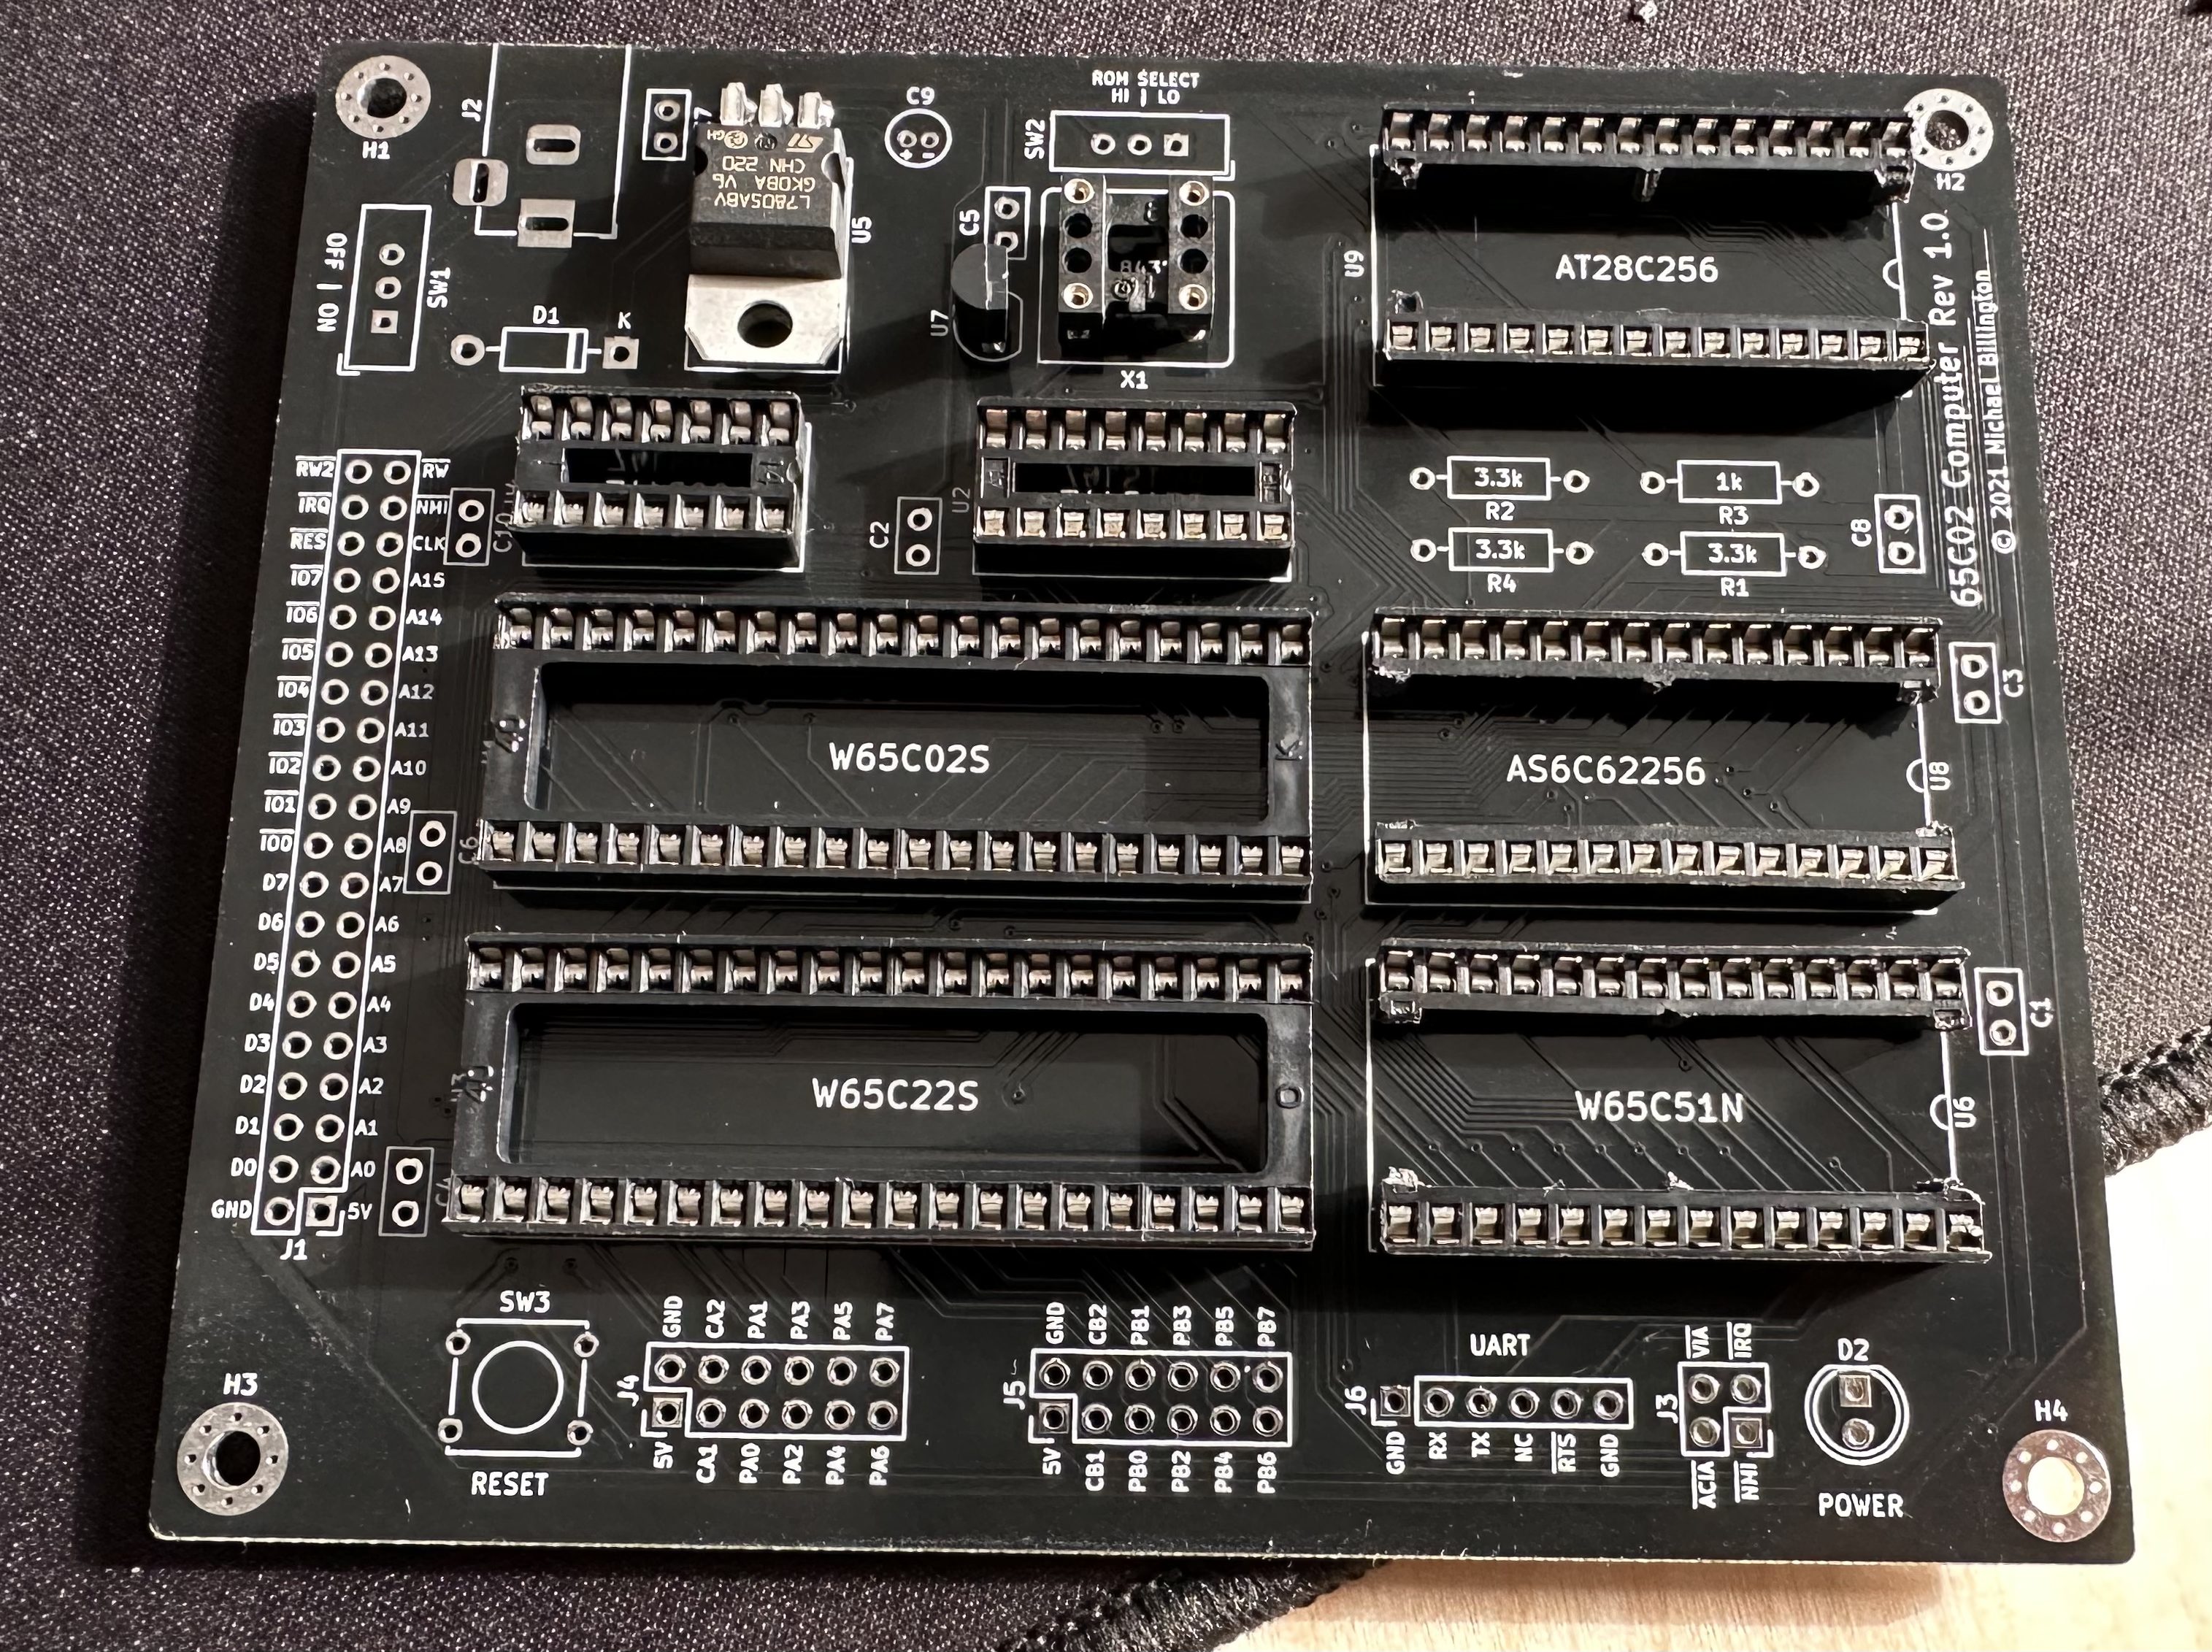
Then adding the rest of the components (headers, resistors, switches, barrel jack port, diode, capacitors, and power LED):
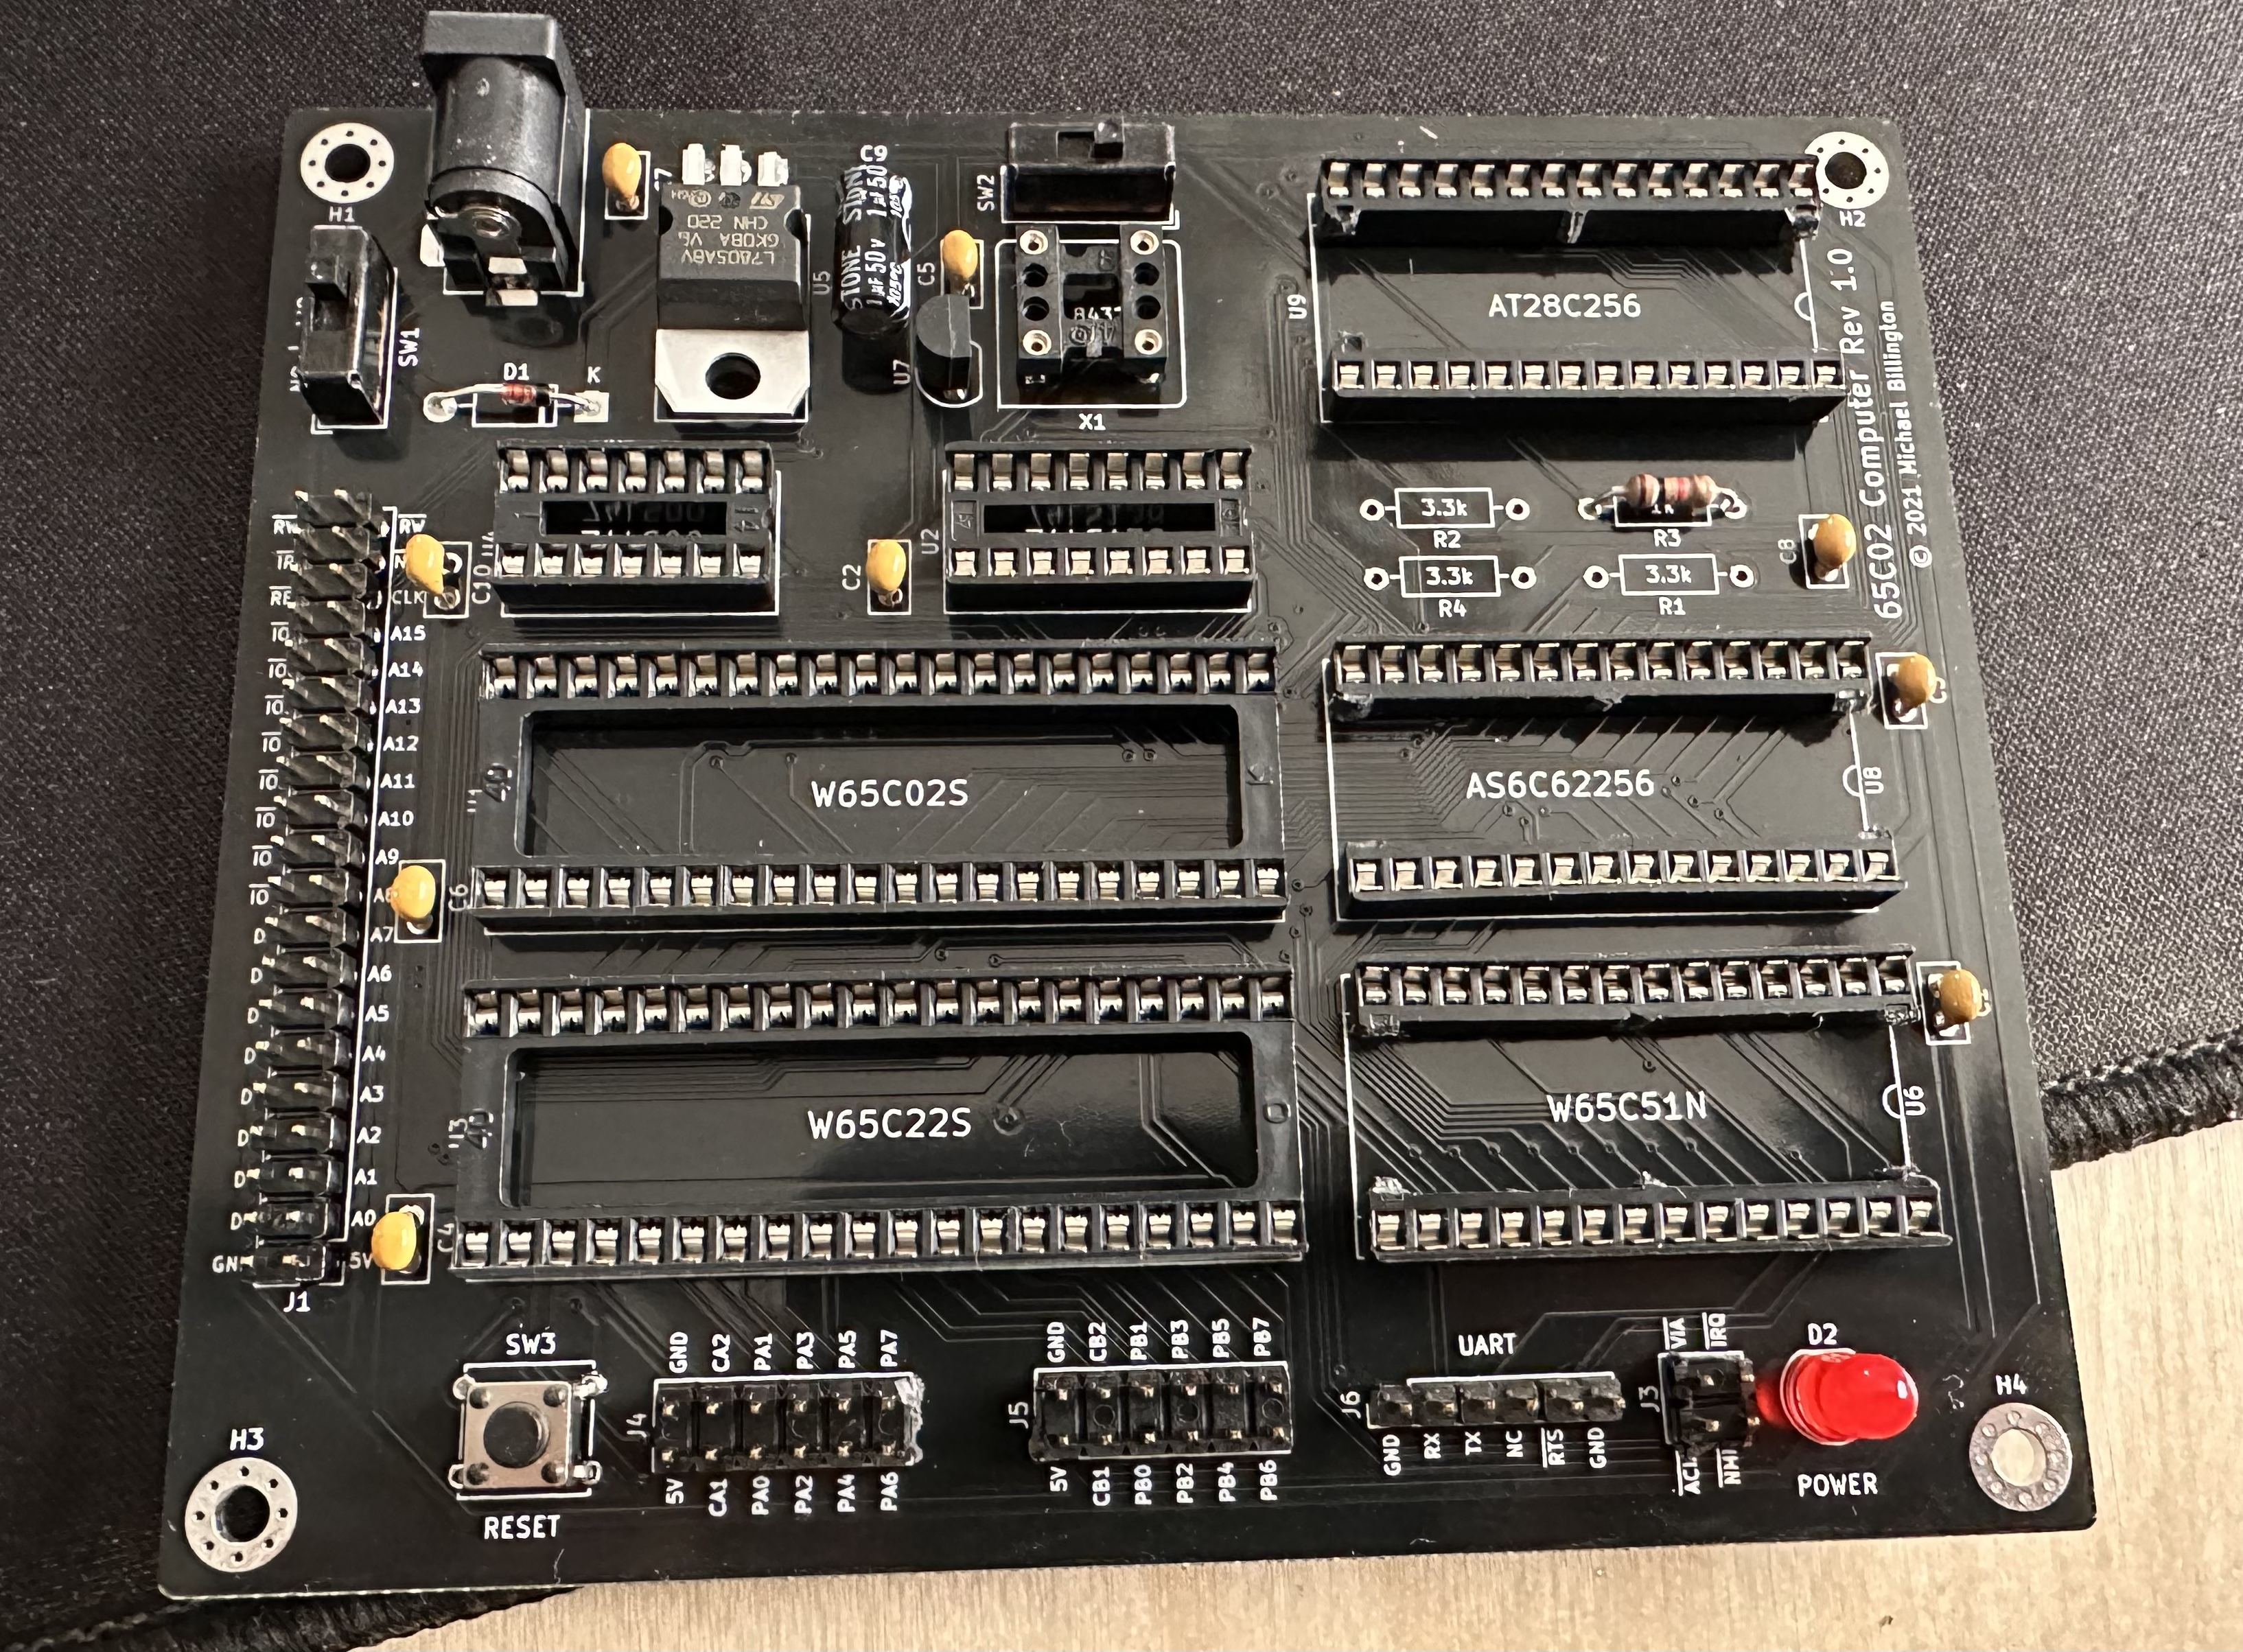
The First Problems
Unfortunately, I was a little too excited to begin this project, and I ended up making a few minor (but fixable!) mistakes. My first mistake was not checking to make sure I had all the parts…I discovered I’m all out of 3.3k resistors, so I’m going to have to wait for a shipment of resistors to finish putting it all together. More importantly, I make the mistake of soldering in all my headers…upside down (short side up). Rookie mistake.
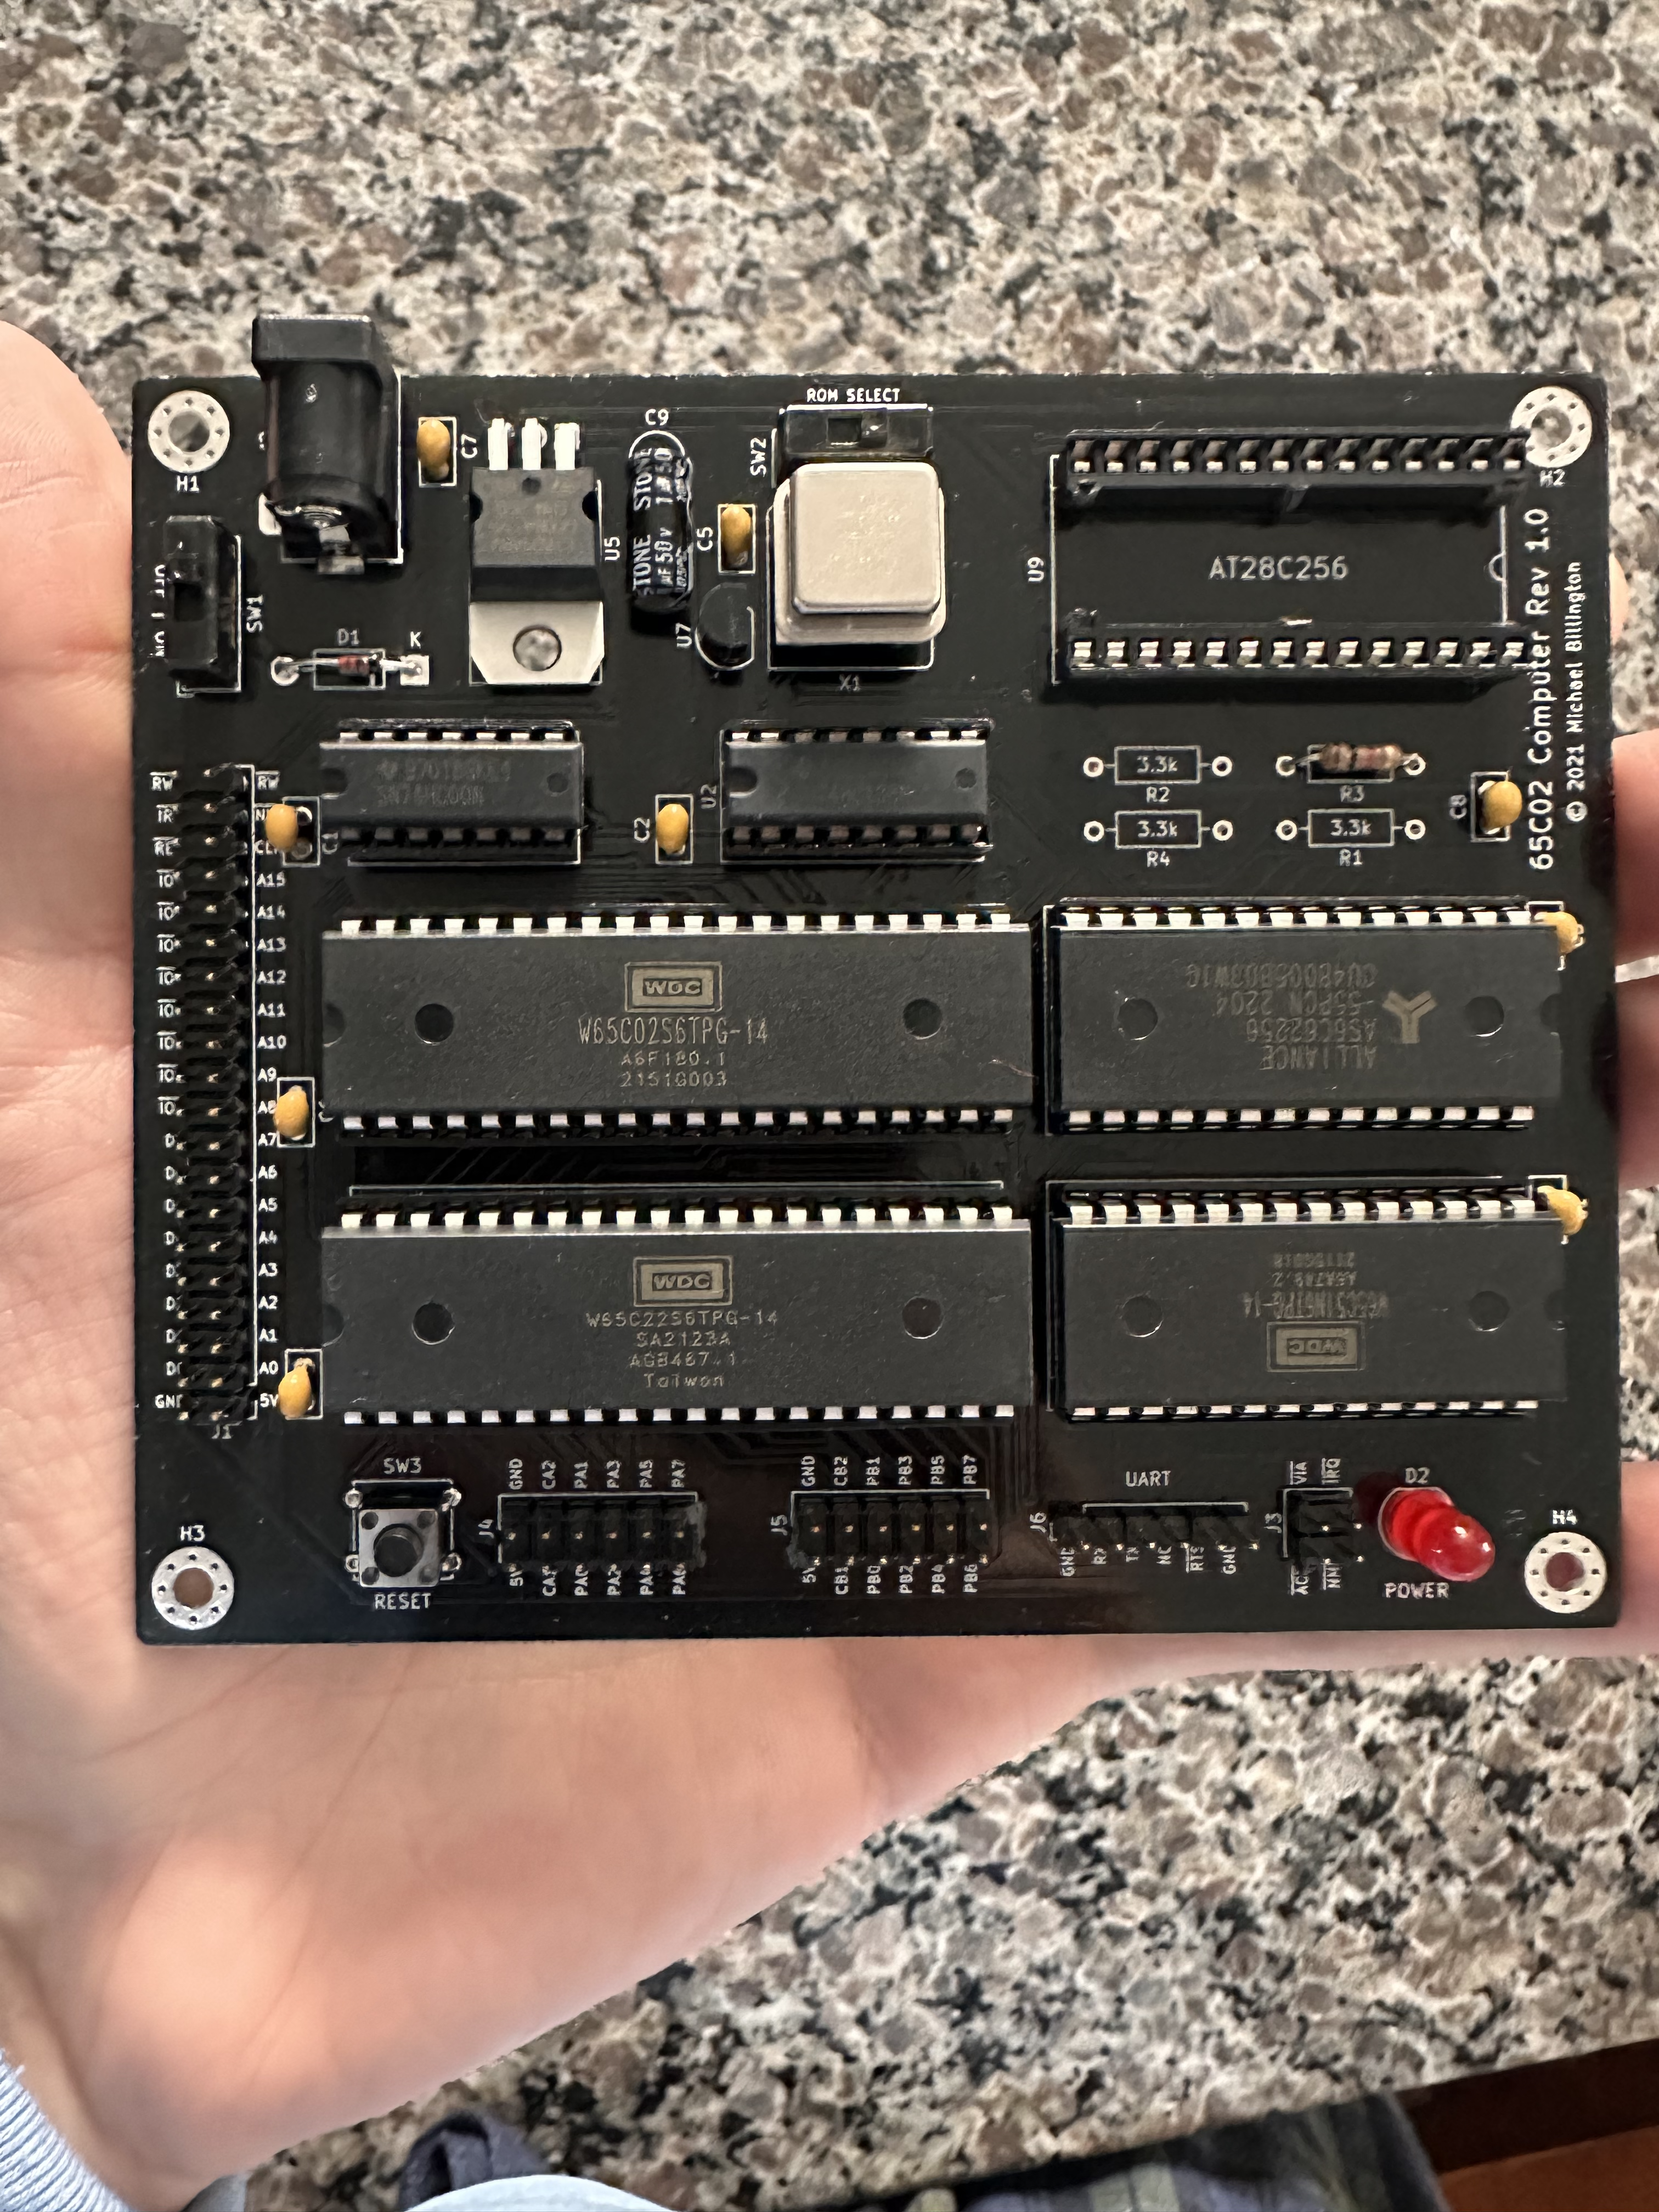
In any case, I figured I could at least socket in the chips I had, since my DIP sockets are all looking good. Below is the final product for now…just waiting on some solder wick and resistors to come in the mail, and then I’ll be back at it in no time.